Better Observability on Ruby on Rails Logs with OpenTelemetry Trace and Span ID (Part 1 - Preparing Rails Application)
February 24, 2023
In this part, I will mainly focusing on preparing Rails application. If you already know about the Rails and want to only focusing on how to make the logs better, you can skip this part and jump to Part 2.
Prepare Rails Application #
To make this tutorial is easier to follow both for experienced RoR developers and newcomers, I will create easy to follow step by step tutorial from installing Rails to adding OpenTelemetry library to customize the log output in Rails application. I hope it also gives you (the reader) idea on how adding OpenTelemetry on your existing code.
WARNING!!!
All code in this tutorial is not production ready! For example, I don’t validate JWT token but only decode it.
Installing Rails #
I will not tell you to install Ruby and Rails in your host machine. I suggest you to install Docker by following this link:
- Install on Mac https://docs.docker.com/desktop/install/mac-install/
- Install on Windows https://docs.docker.com/desktop/install/windows-install/
- Install on Linux https://docs.docker.com/desktop/install/linux-install/
Then you can pull the Docker Ruby image:
docker pull ruby:3-bullseye
This command will pull the Docker image Ruby with version 3 using Debian codename “bullseye”.
Now, save this file as create-rails.sh in your project directory.
For example, you create the project directory in ~/Project, then save it as ~/Project/create-rails.sh.
This is the script to install Rails version 7.0.4.2 and create new Rails project with name rails-otel.
#!/bin/sh

gem install rails -v 7.0.4.2
rails new rails-otel
Then we can create a Rails project by running this command in your project directory (from the same location where you save the create-rails.sh file):
docker run -v $(pwd)/rails-otel:/rails-otel -v $(pwd)/create-rails.sh:/create-rails.sh:ro ruby:3-bullseye /bin/bash create-rails.sh
Above command will tell Docker to run Docker image ruby:3-bullseye by mounting two volumes:
$(pwd)/rails-otel:/rails-otelmeans that we will make any files written by Docker container to persist in our host machine.$(pwd)/create-rails.sh:/create-rails.sh:rotells Docker to include thecreate-rails.shfile from host machine to the container with read only mode. This is file that we need to run inside the Docker container.
Then argument /bin/bash create-rails.sh tells Docker to run that command inside the Docker container ruby:3-bullseye.
Now, in the project directory ~/Project you will find new folder containing the Rails code in ~/Project/rails-otel.
Yay! We have created a clean Rails project without installing Ruby and gem Rails in our host machine!
You can see it in this commit: 8540614
Running Rails using Docker #
Now, we already have clean Ruby on Rails project, and it will means nothing if we don’t run it. Again, since we don’t install any Ruby nor gem install rails in our host machine, we need to run it using Docker too.
First, create a file with name entrypoint.sh in the Rails project:
#!/bin/bash
set -e

# Remove a potentially pre-existing server.pid for Rails.
rm -f /myapp/tmp/pids/server.pid

# Then exec the container's main process (what's set as CMD in the Dockerfile).
exec "$@"
As you can read in the comment, it needed to remove any potential pre-existing server.pid for Rails to run.
Then, create another file named development.Docker in the root Rails project directory:
FROM ruby:3-bullseye

RUN apt-get update -qq

# Set workdir to "myapp"
WORKDIR /myapp

# Copy Gemfile and download all Gem required to run.
# This minimize the build time because `bundle` doesn't need to scan all source code.
COPY Gemfile /myapp/Gemfile
COPY Gemfile.lock /myapp/Gemfile.lock
RUN bundle install

# Add a script to be executed every time the container starts.
COPY entrypoint.sh /usr/bin/
RUN chmod +x /usr/bin/entrypoint.sh
EXPOSE 3000

ENTRYPOINT ["entrypoint.sh"]
What we do here is copying Gemfile and Gemfile.lock into Docker container with base image ruby:3-bullseye.
After that, we run bundle install to download all gem dependencies required by our Rails application to run.
Then, we copy entrypoint.sh make it executable by apply chmod +x permission into it and make it as
Docker ENTRYPOINT. We also add EXPOSE 3000 to tell Docker to expose port number 3000.
You may ask where we put the rest of our Ruby code? Why it didn’t COPYed to container?
The answer of this question is: No, we didn’t need to copy our file into Docker container. Because, in this part what we only need is to run Rails application inside Docker container, and we can modify the code via any IDE installed in our host. In this part, our goal is not to make final Docker image to be deployed somewhere, but we use Docker as our development environment.
Finally, to make easier to run, we can use Docker Compose by creating new file named docker-compose.yml:
version: '3.8'

services:
  myapp:
    container_name: myapp
    build:
      dockerfile: development.Dockerfile
    restart: always
    command: bundle exec rails s -p 3000 -b '0.0.0.0'
    ports:
      - "3000:3000"
    volumes:
      - ./:/myapp
In above code, we name our Rails application as myapp with Dockerfile referenced to the file development.Dockerfile we have created above. Then we mount the volume ./:/myapp which means that myapp service will have access of all files in the host current directory and mapped it into /myapp directory inside the Docker container.
Then we need to run command bundle exec rails s -p 3000 -b '0.0.0.0' for Rails application to run in port 3000.
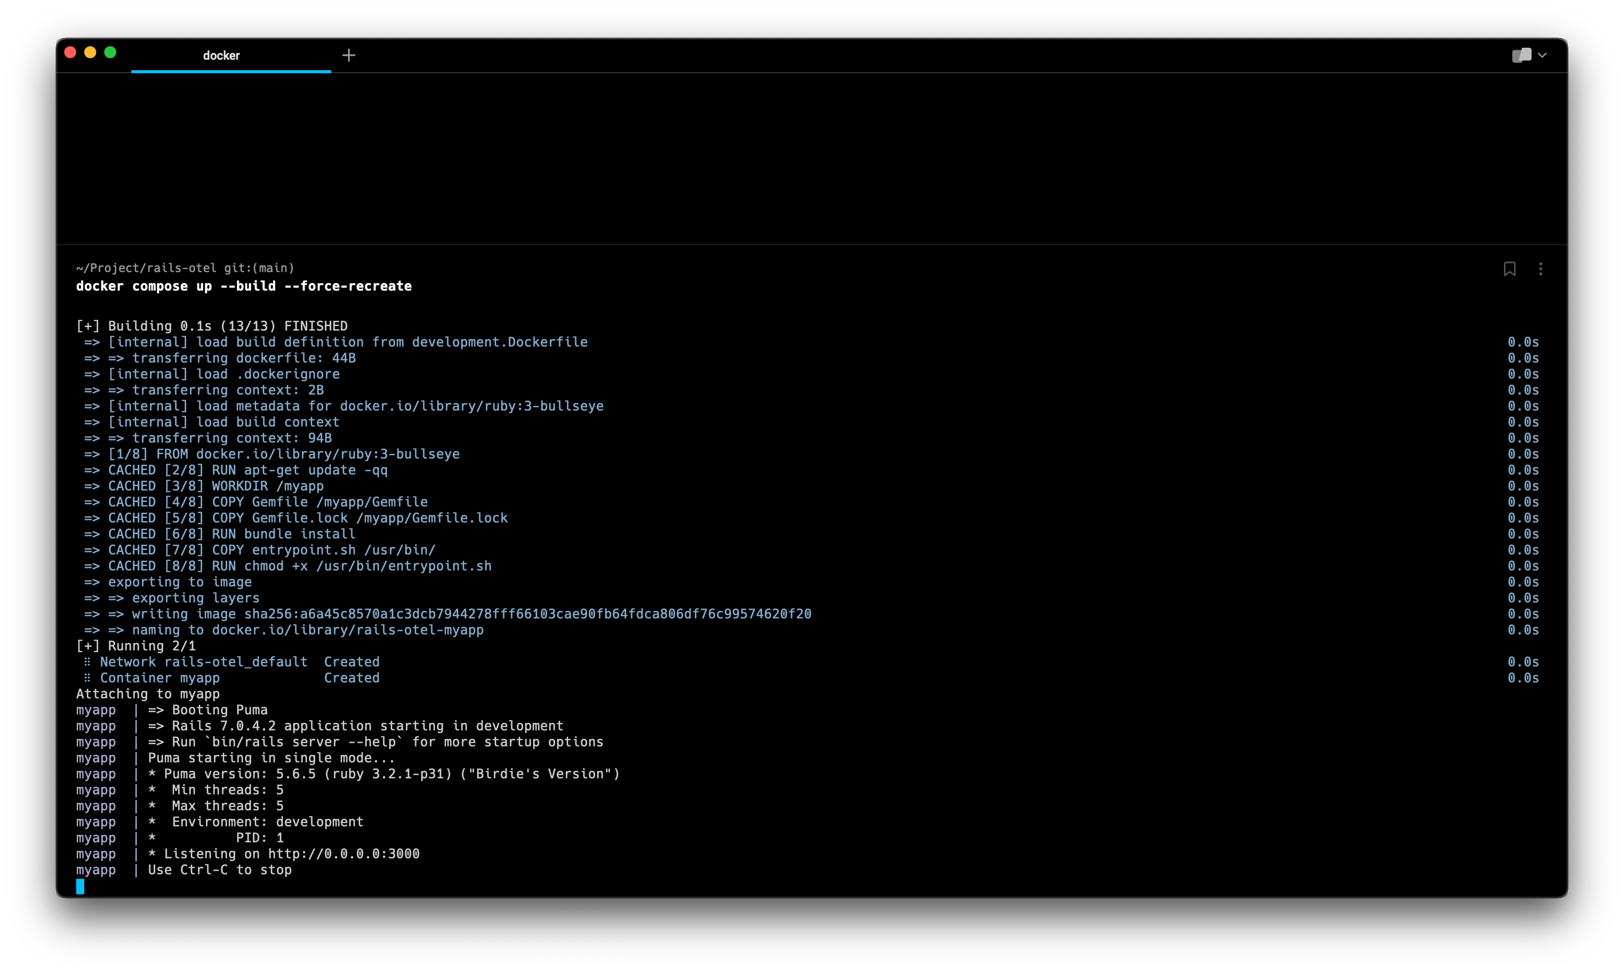
After creating those 3 files (Dockerfile, entrypoint.sh and docker-compose.yml) we can run our Rails app by executing this command:
docker compose up --build --force-recreate
We will see our terminal similar like this:
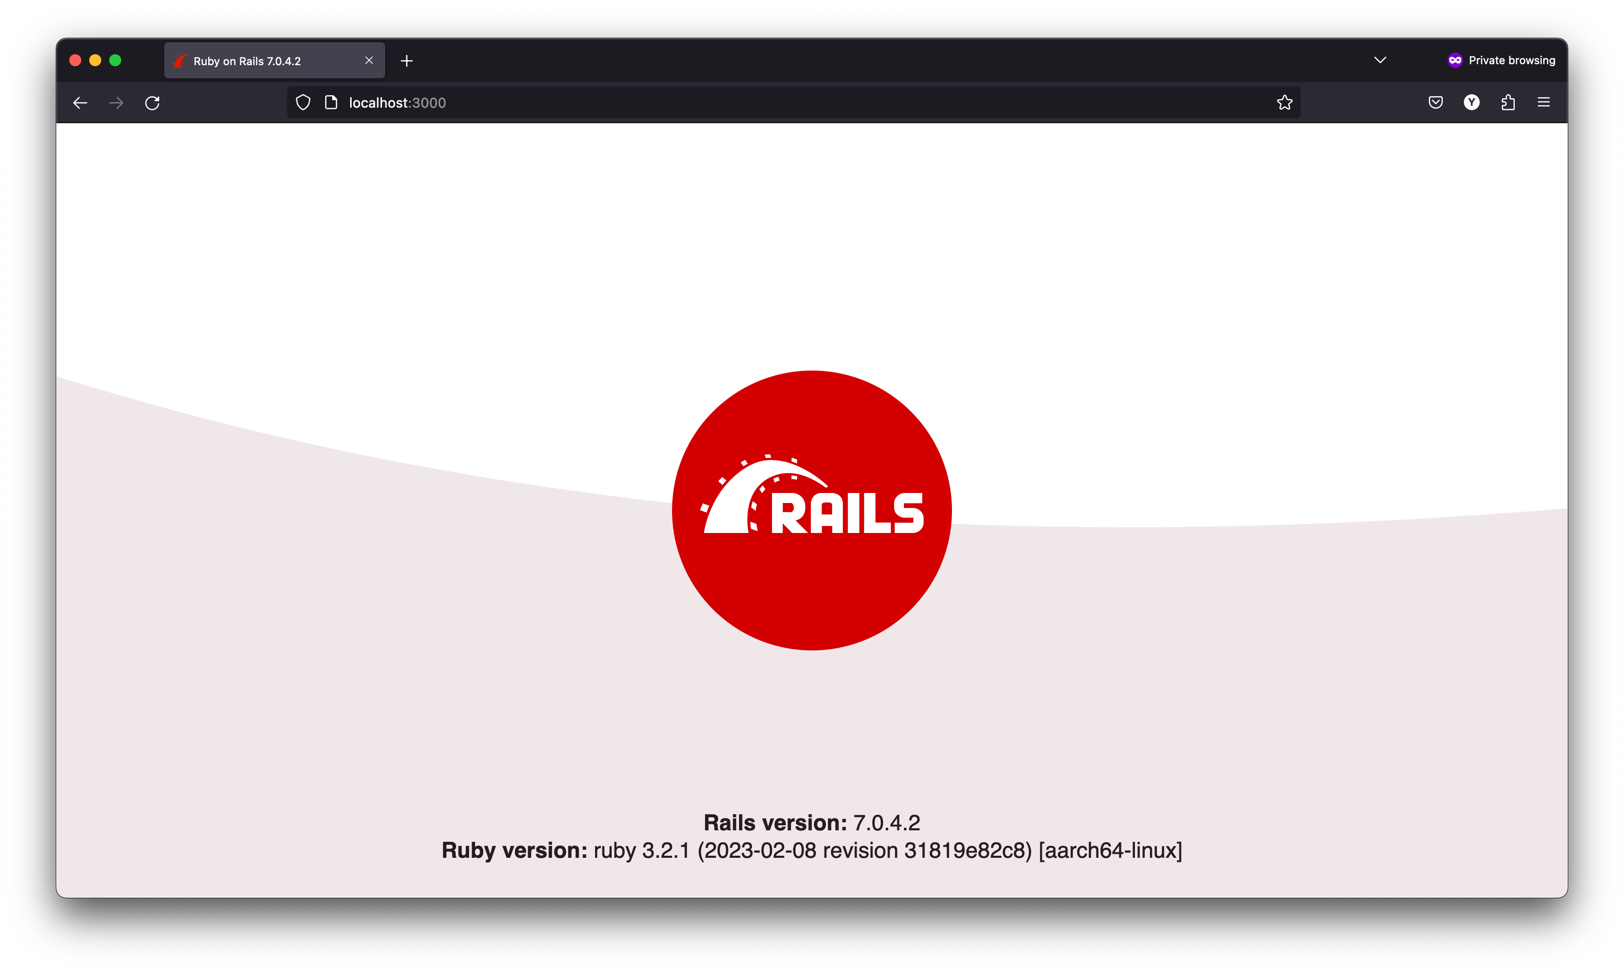
Now, access your browser at http://localhost:3000 it should look like this:
You can see all changes of this section on this commit: 1502a09
Add route mimicking nested function calls operation #
As this article is focusing on how we can get better observability of the logs emitted by Rails application, we need add one route in our router that do nested function calls. This mimicking the real-world application, where one API may do several function calls (or sometimes 3rd party call) before it return response to the user.
For this tutorial, I will create a router where user can apply a Voucher code. I will create the route:
GET /list-vouchers?token=jwt-token
Which will return list of promotion voucher code that can only be accessed by the user (so we need to check whether the user is exists in database or not).
The response will looks like this:
[
  {
    "user": {
      "id": "f2c2d7ba-0d2b-4f2d-8a6c-6b3a69c8d87e",
      "username": "a",
      "name": "a",
      "created_at": "2023-02-28T11:08:36.000Z",
      "updated_at": "2023-02-28T11:08:38.000Z"
    },
    "vouchers": [
      [
        {
          "voucher_code": "REGISTER_ANNIVERSARY",
          "description": "will get 5% discount if user is a loyal users (already joined minimum 1 year)",
          "terms_and_conditions": [
            {
              "discount": 5,
              "min_registered_year": 1,
              "registered_date_is_same": true,
              "registered_month_is_same": true,
              "name_prefix": ""
            }
          ]
        }
      ]
    ]
  }
]
In this process, we need to:
- Get the Authorization token, either from Header or query params.
- Parse the JWT, and get the user id from token.
- Check if the user id is exists on the database.
- Call service Promotions (for now we create a Class that return static output) if user is exist in database, otherwise return error.
This article only focus to show you how to create better logging, so there is may security hole in the code.
Let’s code that!
Preparing Postgres Database and Gem Library To Connect #
Before we create any Ruby code, we need a database to be use by our code. We use Postgres 15 using Docker.
First, stop our previous docker run command (docker compose up --build --force-recreate) in the terminal by using CTRL + C.
Then command docker compose down to make sure all container is stopped.
Then, in our docker-compose.yml file, change to this:
version: '3.8'

services:
  myapp:
    container_name: myapp
    build:
      dockerfile: development.Dockerfile
    restart: always
    command: bundle exec rails s -p 3000 -b '0.0.0.0'
    ports:
      - "3000:3000"
    volumes:
      - ./:/myapp
    depends_on:
      - postgres
    environment:
      DATABASE_USERNAME: root
      DATABASE_PASSWORD: password

  postgres:
    image: postgres:15
    container_name: postgres
    restart: always
    ports:
      - "5433:5432"
    environment:
      - POSTGRES_USER=root
      - POSTGRES_PASSWORD=password
      - POSTGRES_DB=postgres
      - POSTGRES_INITDB_ARGS="--data-checksums"
    volumes:
      - ./docker-data/postgres:/var/lib/postgresql/data
      - ./docker-postgres-init.sql:/docker-entrypoint-initdb.d/docker-postgres-init.sql:ro
This will tell Docker to add new container postgres:15 with username root and password password. And passing this credentials to myapp container.
Then, as we specified in the volumes section, we need to create a file with name docker-postgres-init.sql in our root project directory:
CREATE DATABASE rails_otel_dev;
GRANT ALL PRIVILEGES ON DATABASE rails_otel_dev TO root;
This will tell the Postgres to create 3 databases (rails_otel_dev, rails_otel_test, and rails_otel_prod) when first run.
All data will be persisted in ./docker-data/postgres as we mount our Docker volume into it.
Don’t forget to add docker-data in the .gitignore to ensure that all data created by Postgres is not committed to our Git repo.
  37 # Ignore IDE index file
  38 /.idea
+ 39 docker-data
  40
Then, to make our Rails application can connect to Postgres, we need to add pg Gem library, by adding to the Gemfile:
  50
+ 51 # Pg is the Ruby interface to the PostgreSQL RDBMS. It works with PostgreSQL 9.3 and later.
+ 52 gem 'pg', '~> 1.4', '>= 1.4.6'
  53
Lastly, in change the config/database.yml file with this configuration:
default: &default
  adapter: postgresql
  encoding: unicode
  pool: <%= ENV.fetch("RAILS_MAX_THREADS") { 5 } %>
  timeout: 5000
  host: postgres
  port: 5432
  username: <%= ENV['DATABASE_USERNAME'] %>
  password: <%= ENV['DATABASE_PASSWORD'] %>

development:
  <<: *default
  database: <%= ENV['DATABASE_DB_NAME'] %>

# Warning: The database defined as "test" will be erased and
# re-generated from your development database when you run "rake".
# Do not set this db to the same as development or production.
test:
  <<: *default
  database: <%= ENV['DATABASE_DB_NAME'] %>

production:
  <<: *default
  database: <%= ENV['DATABASE_DB_NAME'] %>
git diff
- # SQLite. Versions 3.8.0 and up are supported.
- #   gem install sqlite3
- #
- #   Ensure the SQLite 3 gem is defined in your Gemfile
- #   gem "sqlite3"
- #
default: &default
-  adapter: sqlite3
+  adapter: postgresql
+  encoding: unicode
  pool: <%= ENV.fetch("RAILS_MAX_THREADS") { 5 } %>
  timeout: 5000
+  host: postgres
+  port: 5432
+  username: <%= ENV['DATABASE_USERNAME'] %>
+  password: <%= ENV['DATABASE_PASSWORD'] %>


development:
  <<: *default
-  database: db/development.sqlite3
+  database: <%= ENV['DATABASE_DB_NAME'] %>

# Warning: The database defined as "test" will be erased and
# re-generated from your development database when you run "rake".
# Do not set this db to the same as development or production.
test:
  <<: *default
- database: db/test.sqlite3
+ database: <%= ENV['DATABASE_DB_NAME'] %>

production:
  <<: *default
- database: db/production.sqlite3
+ database: <%= ENV['DATABASE_DB_NAME'] %>
In the above configuration, we connect to Postgres with hostname postgres (because we run in the internal Docker network).
Lastly, to ensure we already install and connected with to Postgres, we can run the Docker run command again:
docker compose up --build --force-recreate
Now, try to access or hard refresh http://localhost:3000 again, it should still return the Rails homepage as shown in Figure 2 above.
You can see all these changes in this section here: 853fda5
Creating Users Table and Connecting Using Active Record #
In the terminal run this command to create a database migration files:
docker compose run --no-deps myapp rails generate migration EnableUUIDExt
And
docker compose run --no-deps myapp rails generate migration CreateUsersTable
You will get two new files:
db/migrate/20230228035405_enable_uuid_ext.rbdb/migrate/20230228035420_create_users_table.rb
Please note that the prefix value (20230228035405 or 20230228035420) is the current timestamp when you run the command. You don’t need to be careful of that, because the important things is the file content.
In the db/migrate/20230228035405_enable_uuid_ext.rb replace the file content with this:
class EnableUuidExt < ActiveRecord::Migration[7.0]
  def change
    enable_extension "uuid-ossp"
  end
end
This will tell Rails to create a uuid-ossp extensions, similar like we run this query:
CREATE EXTENSION IF NOT EXISTS "uuid-ossp";
And in the file db/migrate/20230228035420_create_users_table.rb replace the file content to this:
class CreateUsersTable < ActiveRecord::Migration[7.0]
  def up
    create_table :users, :id => false do |t|
      t.column :id, 'uuid', :null => false, :primary_key => true, :default => "uuid_generate_v4()"
      t.string :username, :null => false
      t.string :name, :null => false, :default => ''
      t.timestamps
    end

    add_index :users, :username, unique: true
  end

   def down
      drop_table :users
    end
end
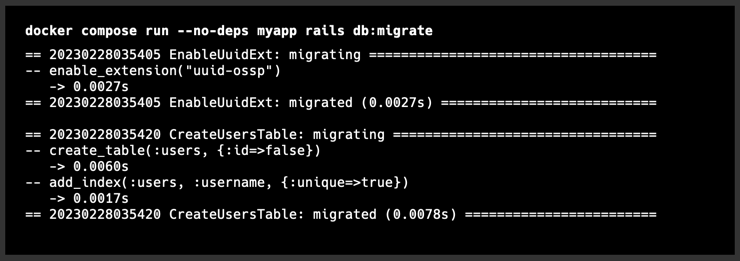
Then run this command in the terminal to create the table in Postgres database:
docker compose run --no-deps myapp rails db:migrate
You will get the output similar like this:
To verify that our database migration is applied in our Postgres container, run this command:
docker compose run --no-deps postgres psql -U root -h postgres rails_otel_dev
Type the password which is password, then run command \d inside it. We will see that we now have 3 tables:
- ar_internal_metadata
- schema_migrations
- users
docker compose run --no-deps postgres psql -U root -h postgres rails_otel_dev
Password for user root:
psql (15.2 (Debian 15.2-1.pgdg110+1))
Type "help" for help.

rails_otel_dev=# \d
               List of relations
 Schema |         Name         | Type  | Owner
--------+----------------------+-------+-------
 public | ar_internal_metadata | table | root
 public | schema_migrations    | table | root
 public | users                | table | root
(3 rows)

rails_otel_dev=#
You can see all these changes in this section here: c707a25
Creating Services, JWT encoder/decoder, and Controller #
In this section, I will go straightforward of what code we need to write. This is because the article already long enough, and we still don’t get to the main part where we should change our log output to get better observability. So, I may not write long explanation about what the code is doing, and just put the file name and code.
Now, we need to create model to interact with our table in file app/models/user.rb:
class User < ApplicationRecord
end
This is for Rails application to interact with the users table we create before.
Then create a file in app/externals/promotions/promotion_service.rb:
module Promotions
    class PromotionService

        def self.list_vouchers()
            # random sleep from 100ms to 500ms
            s = (rand(100...500).to_f/1000).to_f # divide by 1000 to get millisecond

            Rails.logger.debug "PromotionService.list_vouchers call started"
            sleep(s)
            Rails.logger.debug "PromotionService.list_vouchers done"

            return [
                [
                    'voucher_code' => 'REGISTER_ANNIVERSARY',
                    'description' => 'will get 5% discount if user is a loyal users (already joined minimum 1 year)',
                    'terms_and_conditions': [
                        'discount' => 5,
                        'min_registered_year' => 1,
                        'registered_date_is_same' => true,
                        'registered_month_is_same' => true,
                        'name_prefix' => "",
                    ]
                ],
                [
                    'voucher_code' => 'I_AM_JAN',
                    'description' => "will get 1% discount if user have name prefix 'jan' because our app is launched at January!",
                    'terms_and_conditions': [
                        'discount' => 1,
                        'min_registered_year' => 0,
                        'registered_date_is_same' => false,
                        'registered_month_is_same' => false,
                        'name_prefix' => "",
                    ]
                ]
            ]

        end
    end
end
This to mimicking external service that we need to call via network (either HTTP or gRPC, and that’s the reason why I put it under app/externals directory). Supposed that we designed our system using microservice architecture, we may split into several separated service and we call it from main application. But, instead writing some real another service and call it, in this section I write a hard-coded object in class PromotionService that mimicking the response of the Promotions service when we request list of voucher code. Since this code will never return error, I added some sleep operation mimicking the network call latency and some logger before and after it.
Now, create another file app/services/vouchers/user_voucher.rb that do the main business logic:
- Get user information from database
- Call the
PromotionServiceabove and return the user object and list of vouchers.
module Vouchers
    class UserVoucher

       def self.vouchers(user_id)
           Rails.logger.debug "reaching business logic"
           Rails.logger.debug "doing query get user by id #{user_id}"
           user = User::find_by(:id => user_id)

           throw :NotFoundUser if user.nil?

           Rails.logger.debug "calling PromotionService.list_vouchers from UserVoucher.list_vouchers #{user_id}"
           vouchers = Promotions::PromotionService::list_vouchers()

           return [
               'user' => user,
               'vouchers' => vouchers
           ]
       end

    end
end
Now, we need to create a library for encoding and decoding the Json Web Token. To do that, we need to install some gem in our Gemfile:
  53
+ 54 # A pure ruby implementation of the RFC 7519 OAuth JSON Web Token (JWT) standard.
+ 55 gem 'jwt', '~> 2.7'
+ 56
We install library jwt to decode and encode the JWT.
Then create a file lib/json_web_token.rb:
class JsonWebToken

  def self.encode(payload)
    return JWT.encode(payload, Rails.application.secrets.secret_key_base)
  end

  def self.decode(token)
    Rails.logger.debug "validating JWT"
    return JWT.decode(token, Rails.application.secrets.secret_key_base)
  rescue
    nil
  end
end
Now, let’s create the controller and route for it.
We need add library responders since we need respond_to method that
are no longer a part of Rails. In Gemfile add this line:
+ 56
+ 57 # A set of Rails responders to dry up your application
+ 58 gem 'responders', '~> 3.1'
+ 59
Then change the file app/controllers/application_controller.rb into this to register the function loaded in controllers.
  1 class ApplicationController < ActionController::Base
+ 2    include ActionController::MimeResponds
  3 end
  4
After that, create the controller file app/controllers/UserPromotionController.rb:
require_dependency "json_web_token"

class UserPromotionController < ApplicationController

    def list_vouchers
      Rails.logger.debug "request accepted by controller"

      begin
          token = ""
          auth = request.headers['Authorization']
          if !auth.nil?
            token = auth.split(' ').last
          end

          if token.empty?
            Rails.logger.debug "accepting token from query params"

            token = request.query_parameters['token']
          else
            Rails.logger.debug "accepting token from headers"
          end

          token_extracted = JsonWebToken::decode(token)
          if token_extracted.nil? || token_extracted.to_a.length() <= 0
            return respond_to do |format|
              format.any {render :json => [
                'message' => 'nil extracted token'
              ]}
            end
          end


          jwt_payload = token_extracted[0]
          if jwt_payload.nil?
            return respond_to do |format|
              format.any {render :json => [
                'message' => 'nil jwt payload'
              ]}
            end
          end

          user_id = jwt_payload['user_id']
          if user_id.nil? || user_id.empty?
            return respond_to do |format|
               format.any {render :json => [
                 'message' => 'empty user id from jwt payload'
              ]}
            end
          end

          out = Vouchers::UserVoucher::vouchers(user_id)
          Rails.logger.debug "controller done processing the request, preparing rendering response"

          return respond_to do |format|
            format.any {render :json => out}
          end
      rescue => err
        return respond_to do |format|
            format.any  {render :json => [
                'message': err
            ]}
        end

      end # end of begin-rescue
    end

end
Now, we have our controller that accept token (JWT) via header or query params token, then encode it using JsonWebToken::decode(token) that we create in lib/json_web_token.rb to get the user_id. After that we pass this user_id to UserVoucher::vouchers(user_id) which we defined in app/services/vouchers/user_voucher.rb.
But, this controller cannot be accessed until we register the routes.
Registering Routes #
First, we need to make sure all our previous code loaded by Rails by adding this line in config/application.rb:
config.watchable_dirs['lib'] = [:rb]
Then register our controller in config/routes.rb:
get 'list-vouchers', to: 'user_promotion#list_vouchers'
Done! Please re-run the command docker compose up --build --force-recreate again. It will install the library jwt and responders.
Now we have the routes that can be accessed http://localhost:3000/list-vouchers?token=jwt.access.token. But, we don’t have any real user saved in our Postgres and we don’t have any JSON Web Token yet. Let’s go to next section!
You can see changes in this section here: c85c199
Insert User data and Create JWT access token via rails console
#
We can invoke and run any code of our code by launching the rails console. Since we are using Docker for our development tools, we can run rails console inside the container:
docker compose run --no-deps myapp rails console
Then, to insert the User with username jane and name Jane Kepiye Karepe To we can run this code inside the rails console launched by previous command:
User::create(username: "jane", name: "Jane Kepiye Karepe To")
Then continue with running this command to get the previous inserted user and generate JWT token:
Note: run this line by line.
u = User::find_by(username: "jane")
require_dependency "json_web_token"
token = JsonWebToken::encode({user_id: u.id})
You will get the output something like this:
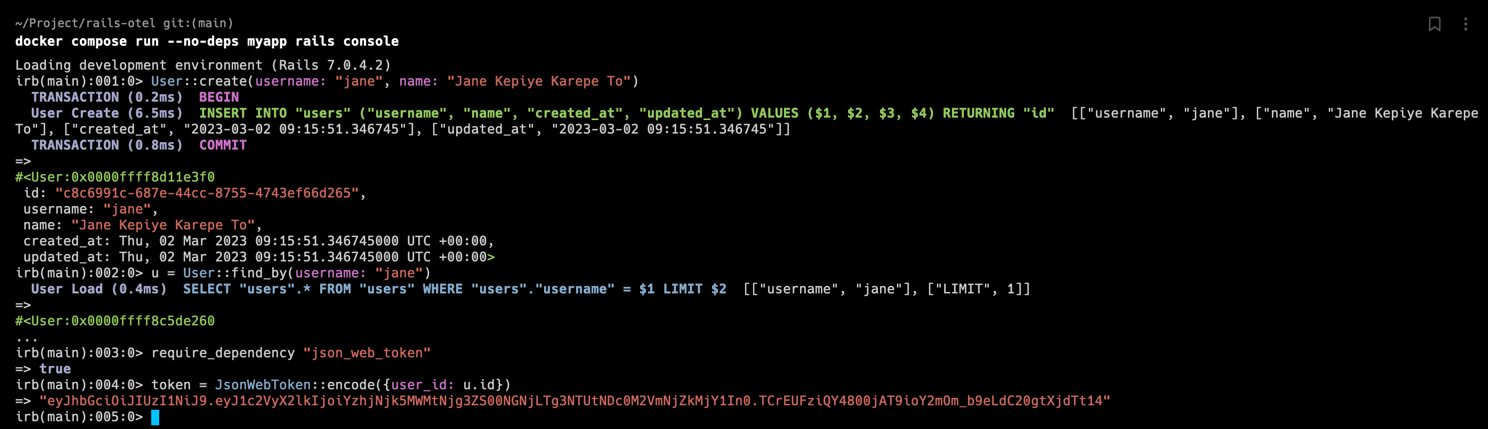
In this example, you get the JWT token. Your generated token may be different, use your own token!
eyJhbGciOiJIUzI1NiJ9.eyJ1c2VyX2lkIjoiYzhjNjk5MWMtNjg3ZS00NGNjLTg3NTUtNDc0M2VmNjZkMjY1In0.TCrEUFziQY4800jAT9ioY2mOm_b9eLdC20gtXjdTt14
Accessing the routes #
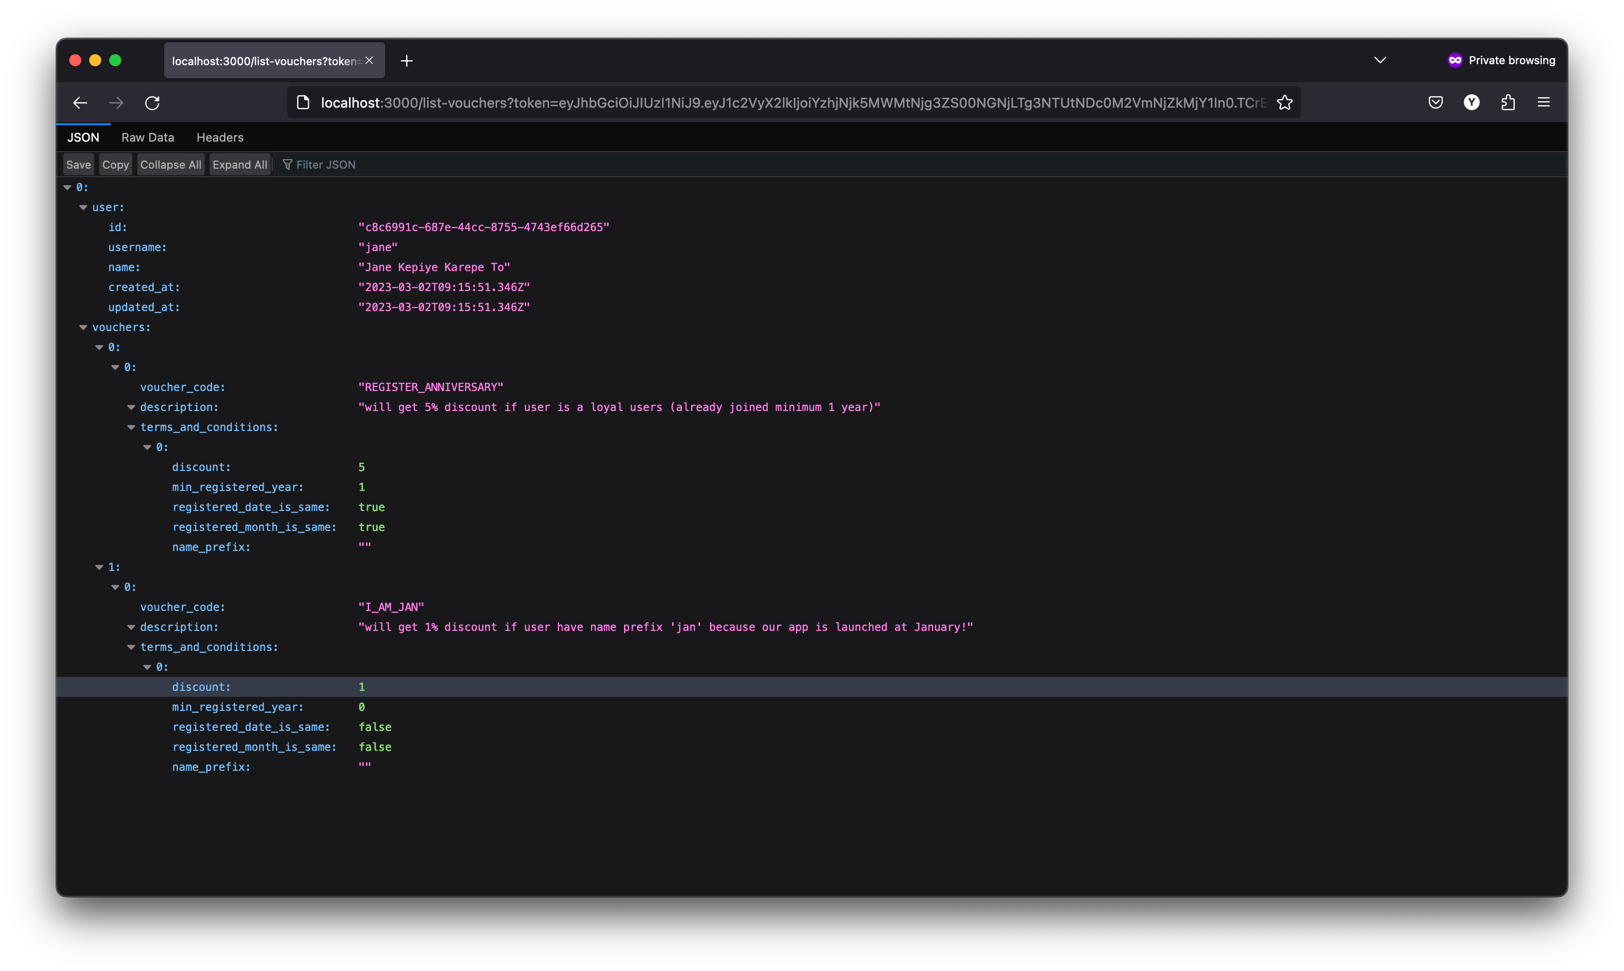
You can access the page http://localhost:3000/list-vouchers?token={your-token} which will return the JSON similar as shown in figure 5.
Finally, we have a single route Rails application in this part. Then, we can go to Part 2 to learn what the problem we have if we use this code in high traffic and how to improve it.